
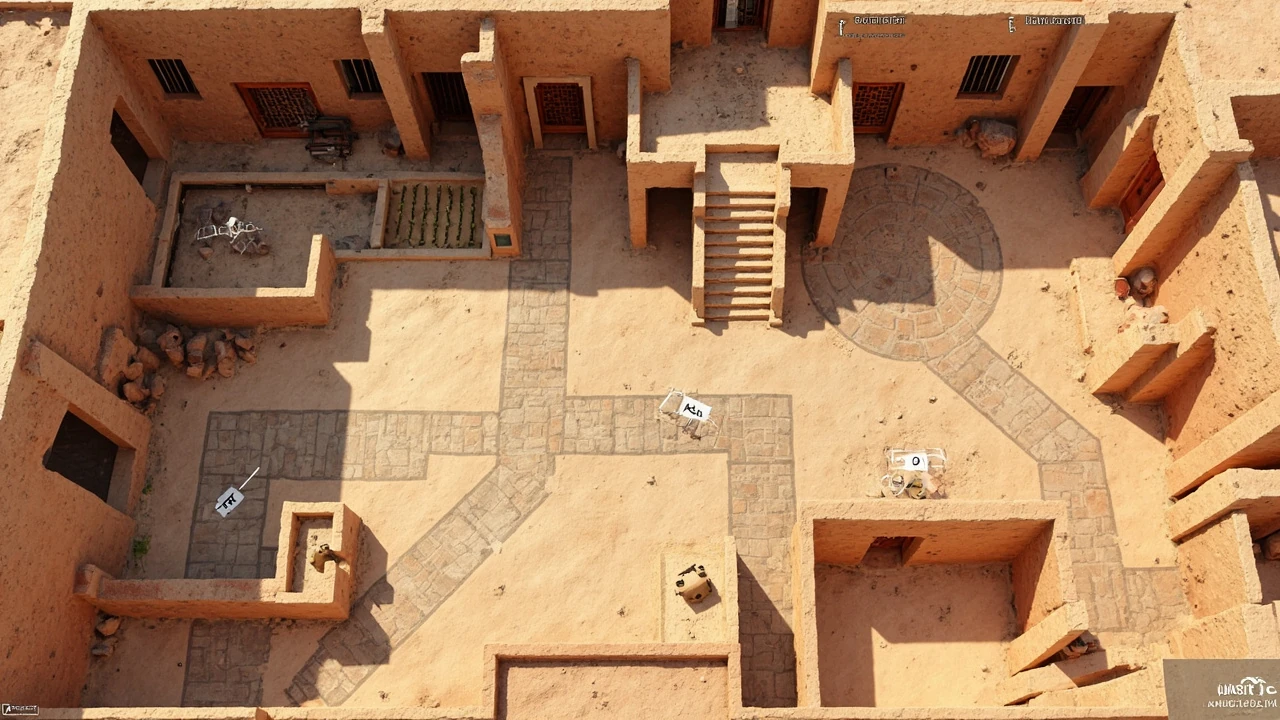

A confident team on Bind starts with the same handful of habits: a short callout vocabulary, a small set of reliable smokes, and a clear plan for the round timer. Bind does not give you rotation time. Once a site is exposed, the teleporters and short sightlines mean defenders can flood from one side while attackers are still clearing the other. That reality shapes every decision the article below tries to make clearer.
What follows is a working reference for the Bind Valorant map, written for players who already know the basics of the game and want to tighten their play on this specific map. The pieces that matter are the layout itself, the callouts your team should standardize, the smokes that solve the most common problems, and the patterns that work on both attack and defense. Each section is built so you can read it once and use it in a match without re-reading the whole page.
Bind Valorant map layout: what makes the map different
Bind is a two-site map in the Valorant competitive pool that has no mid control in the traditional sense. Instead, attackers and defenders share a pair of teleporters that connect the middle of the map directly to the attacker side and to the defender side. Those teleporters are the single most important architectural feature on the map, because they compress the rotation timeline and reward whichever team uses them first.
For a developer or technical player thinking about how the map is designed, the lesson is the same one Riot’s level design team has repeated in interviews: a small map with strong rotate tools creates faster round clocks and forces both teams to gamble on information. The result on Bind is a steady pressure to commit to a site early, because the alternative is getting collapsed on by a team that simply walked through the other teleporter.
Site A and site B in plain terms
Both sites are tight and have a single main entrance plus a smaller secondary entry. A site is approached from attacker side through a long corridor that ends in a switchback. B site is a smaller box with two real entries, one of which is reachable through a short alley that defenders like to hold. There is no third site and no extended mid area to fight over, which is why binds tend to feel faster than maps like Haven.
Why the teleporters matter
Each teleporter is a one-way door with a short charge-up sound. The defender-side teleporter feeds into B site from the back of the site, and the attacker-side teleporter feeds into a small room just outside A site. Both are loud, both are visible, and both can be destroyed with utility in late round situations. They are not safe rotations. They are a tool that turns information into time, and they only give that time to the team that spots the rotate first.
The terrain around the sites
The terrain in Bind leans on Moroccan town architecture, with sandstone walls, low archways, and a few open plazas that act as chokepoints. A site sits against a wall with the teleporter room just outside its back door, and B site is bordered by a hookah-style room that gives defenders a strong off-angle. Between the two sites sits the market corridor, which is the closest thing the map has to a mid lane, and a small switchback that connects A short to the back of A site. Learning to read the wall geometry is half the work of learning the map, because most of the off-angles are tied to wall corners rather than to open ground.
Standard Bind Valorant callouts your team should agree on
Callouts are the cheapest utility in the game. Bind’s callouts are not standardized across every region the way some maps are, which is why teams that queue together benefit from spending two minutes in a custom game agreeing on a short list. The list below is enough to call every common position without sounding like a commentator.
- A lobby: the wide attacker-side entry area outside A site, useful for calling early pushes.
- A short: the short alley to the right of A lobby that lets attackers peek A site from a low angle.
- A site / A default: the main plant area, including the default plant position near the back boxes.
- A heaven: the raised platform with the long sightline into A site, often the first area a defender will give up.
- A switch: the small room with the doorway that connects the back of A site to attacker side.
- B lobby: the attacker-side open area outside B site, a frequent location for early picks.
- B site: the smaller of the two plant areas, with limited cover.
- B elbow: the corner just outside B site that controls the entrance from the alley.
- B long: the longer attacker path that wraps around B site, often called by some teams as market or B hall.
- Hookah: the small room with the window and the door near mid that controls the teleporter exit.
- Showers: the short corridor between A lobby and the attacker-side teleporter, often used as a rotate path.
- Attacker teleporter: the teleporter on attacker side that exits near A site.
- Defender teleporter: the teleporter on defender side that exits into B site.
A team that has agreed on this vocabulary before the match will spend fewer rounds clarifying where the enemy actually is. The same callout also helps a developer reading the page understand how a small map concentrates the action into a few well-known locations.
Best smokes for Bind Valorant by site
Bind is a utility-friendly map because the choke points are short and obvious. A well-placed smoke can shut down a sightline, while a poorly placed one only creates a useful gap for the enemy. The smokes below are organized by site and by the problem they solve.
A site smokes
- A heaven smoke: blocks the defender on the platform from spotting an A site take, gives attackers time to clear the back of the site.
- A short smoke: covers the angle from short into the default plant, useful when your team is committing from the lobby.
- A switch smoke: cuts off the rotate through switch when your team knows at least one defender is not on site yet.
- Showers smoke: stops a defender from peeking the attacker-side teleporter exit during an A take.
B site smokes
- B elbow smoke: the most important B smoke, blocks the corner that defenders use to spot a B take early.
- B long smoke: covers the back line of B site, useful when your entry duelists need a clean cross.
- Defender teleporter exit smoke: a quick cover line that delays a defender rotate through the teleporter, buying your team a few seconds to plant.
On a map this small, the difference between a good smoke and a wasted smoke is often a few degrees of crosshair placement. The two B smokes in particular are worth learning from the same two positions, because B is small enough that a single pixel of difference changes whether a defender can see your entry or not.
Attack side strategy on Bind Valorant
Attack on Bind rewards pace. The round timer is short, the sites are close, and the teleporters give the defending team a free rotate if the attackers hesitate. The default plan is to commit to a site within the first twenty to thirty seconds, then use the plant to either trade out defenders or hold for the post-plant scenario.
Default A take
The standard A take on Bind begins with a controller smoking A heaven and A short, then sending a duelist into A site from the lobby while a second player wraps through A short. The third player is the trade, the fourth is the flash, and the fifth is the lurker watching for the early rotate from the defender-side teleporter. The lurker matters because Bind is the map where a single B-side lurker can delay the whole defender rotation.
After the plant, the team should split between the back boxes and the A short corner, because defenders on retake will come from the back of the site and from the switch door. A site is small enough that two players can hold it from those positions with the right utility.
Default B take
The default B take is faster but riskier. The elbow smoke is mandatory, the long smoke is helpful, and the entry duelist should peek the corner as soon as the smoke is up. B site is a smaller box than A, so the team has less room to spread out after the plant. The usual post-plant setup on B is one player holding the back of the site, one watching the teleporter exit, and one playing the long angle.
The split A and B fake
Because the teleporters collapse rotation time, a fake on one site followed by a real take on the other is one of the strongest patterns on Bind. The team that pulls this off needs at least two players who can create real noise on the fake site, while the rest commit to the real take. Once the defenders rotate through the teleporter, the attackers have a small window to take the empty site.
Early-round lurks and mid control
Bind is unusual because the closest thing to a mid lane is the market corridor, which connects the two sites by a short path that bypasses the teleporters. A solo player who can take this corridor quietly can put real pressure on the defense without committing to a site, and that pressure is often what opens up the late-round split take. The risk is that the corridor has a single tight corner near hookah where a defender can hold the entire length of it, so the lurker needs either a flash, a recon ability, or a teammate ready to trade.
Defense side strategy on Bind Valorant
Bind is one of the original maps shipped with the tactical shooter Valorant and has stayed in the competitive pool because it tests a different skill set than the rest of the map pool. The standard comparison is between Bind and Haven, because both are two-site maps with rotation tools. The trade-off is that Haven has a real mid area to fight over, while Bind replaces that mid with teleporters. The result is that Bind is faster and more information-driven, while Haven rewards longer fights and more methodical mid control.
Defense on Bind is about denying information. The two sites are close enough that a defensive team can hold one player in a flexible position to react, but the teleporters make that one player a high-value target. The defender’s job is to make the attackers guess which teleporter is safe to use, then punish whichever one they pick.
Default A hold
The default A hold uses one player on A heaven, one on the back of the site, and one watching A short from inside the site. The remaining two players float, with one usually playing near hookah to react to a teleporter take and the other rotating to whichever site the attackers have shown numbers on. A heaven is the strongest A position because it gives early warning on the lobby push, but it is also the first place attackers will smoke.
Default B hold
The default B hold needs at least two players on site, because B is small enough that one player cannot cover both the elbow and the back. A common split is one player watching elbow from a tight angle and one player watching the long entry. The third player can float near the defender-side teleporter, ready to either take it to A or to B depending on the read.
Using the defender teleporter correctly
The defender teleporter is a tool, not a safety net. A defensive player should only take the teleporter when they have visual confirmation that the attackers are committing to the other site, because the charge-up sound gives away the rotation. The smart pattern is to clear the attacker-side teleporter exit, then take the defender-side teleporter into B, and arrive on B site before the attackers can plant.
Reading the attacker teleporter
On the other side of the round, the attacker teleporter is just as risky. A defender who hears the charge-up should not commit to a fight on the teleporter exit, but should instead re-anchor to cover the most likely post-plant position. The goal is to trade the timing advantage: the defender knows the attacker is about to appear, and the attacker is gambling that the defender is still looking the other way.
Bind Valorant agent picks and roles
Bind rewards agents who can hold short sightlines and who can clear tight angles without losing map control. The agent pool below is a starting point, not a tier list, and assumes a coordinated five-stack.
| Role | Strong picks on Bind | Why the agent works here |
|---|---|---|
| Duelist | Jett, Raze, Reyna | Short entries into A and B benefit from dash, satchel, and dismiss utility that resets fights. |
| Controller | Omen, Brimstone, Viper | Wall and one-way smokes shut down A heaven and B elbow without spending too many credits. |
| Initiator | Sova, Fade, KAY/O | Short site takes need pre-aimed flashes and reveals to clear the tight corners defenders love to hold. |
| Sentinel | Cypher, Killjoy, Chamber | Bind’s narrow chokes make tripwires and traps extremely high value for early information. |
| Flex | Skye, Harbor, Astra | Flex utility works when the team needs a second smoke or a longer-range flash than the default picks offer. |
The list above is a starting point for a coordinated team. Solo queue players should focus on one agent they can play on every map and learn the Bind-specific lineups for that agent, because Bind rewards repetition more than it rewards hero swapping.
Why controllers matter more on Bind
Most maps reward a balanced composition, but Bind is one of the few where a controller can carry a round by shutting down both A heaven and B elbow from the same position. The controller’s value is not just in the smokes themselves, but in the threat of a smoke, which forces defenders to peek a tight angle rather than hold an off-angle. On a map this small, that pressure is worth more than a single pick.
Why sentinels are less dominant than on other maps
Sentinels are usually strong on maps with longer rotations, where a single tripwire can stall a push for ten seconds. On Bind, the defenders can rotate through the teleporter in about a second, which means a sentinel ability that delays a push for a few seconds is less valuable than the same ability would be on a larger map. Sentinels still work, but they should be picked for their retake value rather than their site lockdown value.
Lineups worth memorizing for Bind Valorant
Lineups are the long-tail depth of a competitive map. The table below lists the most common utility lineups that come up in coordinated play, with the problem each one solves.
| Agent | Utility | Where you stand | What it covers |
|---|---|---|---|
| Sova | Recon Bolt | A lobby | Scans the back of A site, including the heaven and switch positions. |
| Sova | Recon Bolt | B lobby | Hits the B long angle and the elbow, common defender hold positions. |
| Viper | Poison Cloud | A lobby | One-way smoke on A heaven for an A site take. |
| Viper | Toxic Screen | Mid | Wall across mid that blocks both rotations during a fake. |
| Brimstone | Sky Smoke | A lobby | Fast smoke on A heaven and A short for a default A take. |
| Brimstone | Sky Smoke | B lobby | One-way smoke on B elbow to assist a B site entry. |
| Omen | Shrouded Step | A short | Short reposition to surprise a defender holding the A short angle. |
| KAY/O | FRAG/ment | A site | Post-plant molly on the default plant to deny a defuse. |
Lineups are worth memorizing only after the basic callouts and the basic site takes feel automatic. Adding lineups to a player who is still learning the map usually produces more confusion than value. A good rule of thumb is to learn two lineups per role, then add more as the muscle memory for the map settles in.
How to think about rotates on Bind Valorant
Rotates on Bind are unusually short. The defender-side teleporter reaches B in about a second, and the attacker-side teleporter reaches A in the same window. That means a defensive player who hears an A take can be on B within a few seconds, and a defensive player who is holding B can collapse on A almost as quickly. The implication is that the round is decided by the first ten seconds of contact, not by the post-plant.
For the attackers, the rotate is also short, but it costs more because the attacker-side teleporter is loud and visible. An attacking player who uses the teleporter to fake a B take while the team takes A is gambling on a defender not standing near the teleporter exit. A team that has not practiced that pattern will lose more rounds than it wins by trying it.
The two types of rotate on Bind
There are really only two types of rotate on Bind: a teleporter rotate and a foot rotate. The teleporter rotate is the loud but fast option, the foot rotate is the slow but quiet option. Most rounds that come down to a rotate are decided by which type the rotating player picked, not by the player’s aim. A defensive player who chooses the teleporter when the attacker is still in the lobby is feeding a free kill, and an attacker who chooses the foot rotate when the spike is already planted is wasting the round clock.
Common mistakes on Bind and how to fix them
Bind punishes the same handful of mistakes every ranked game. The list below is the short version of what a coach would tell a team after a review.
- Slow defaulting on attack. The round clock is short, and a slow default lets defenders stack a site without risk. The fix is to commit to a take within the first twenty seconds or to fake a take and use the other teleporter.
- Not clearing the teleporter exit. Bind’s teleporters are loud, and a player who walks through without clearing the exit is walking into a crosshair. The fix is to smoke the exit or send a flash before the teleport.
- Stacking the same site every round. A defensive team that holds four players on A every round will lose to a single B take. The fix is to keep at least one player floating near the defender-side teleporter.
- Forgetting the post-plant. Both sites are small, and a planted spike is easier to defend than to retake. The fix is to plan the post-plant positions before the round starts, not after the kill feed shows the enemy site.
- Using the teleporter as a panic button. A defensive player who takes the teleporter without checking the other site is feeding a kill. The fix is to clear the other site first, then take the teleporter.
Why solo queue players make these mistakes
Most of the mistakes on Bind are coordination mistakes, not mechanical mistakes. A solo queue player who never plays with the same teammate twice has to learn a different default every game, which is why the same five patterns show up over and over. The fix is not to play better aim, but to communicate the plan in the buy phase and stick to it once the round starts.
How Bind fits into the larger Valorant map pool
Bind is unusual in the current competitive rotation because it does not have a third site or a long mid area. Most of the other two-site maps give the attackers at least one extra piece of map to fight over, but Bind compresses the whole round into the two sites and the two teleporters. That compression is what makes Bind feel faster than it actually is, and what makes it a useful contrast to learn after a player has mastered a slower map like Haven.
For a developer reading the page as a level design reference, the same trade-off shows up in how the map’s geometry is laid out. A short attacker-side teleporter and a short defender-side teleporter collapse the time and space between the two sites, which is exactly what a developer would want to model when designing a fast-paced round of a competitive shooter.
Bind in the ranked meta
In the current ranked meta, Bind tends to favor teams that have at least one player who can flex onto a controller, because the smokes on Bind are more decisive than the smokes on most other maps. The map also rewards players who can lurk, because the teleporters make a single quiet player on the opposite site feel like a full stack. The most common rank range where Bind feels one-sided is in lower ranks, where the team that commits to a site first usually wins, because the rotating team has not yet learned the timing of the teleporters.
Drills to practice Bind on your own
Solo practice on Bind is most useful when the goal is to build muscle memory for a small set of actions, not to learn the whole map. The drills below can be run in a custom game without bots.
- Callout drill. Run from attacker spawn to A site, call out every position you pass, then run from A site to B site using the teleporter. The goal is to be able to call out your position in under a second.
- Smoke placement drill. Pick one agent, pick one site, and practice placing the same three smokes from the same two positions until the smoke always lands in the same pixel. Bind is small enough that a single pixel of difference is the difference between a covered and uncovered angle.
- Post-plant drill. Plant the spike in the default position on A, then take the back-boxes angle and call out which defender entries you can see from that position. Repeat for B.
- Teleporter rotation drill. Stand near the defender-side teleporter, have a teammate peek attacker side, then take the teleporter and call out the first thing you see on the other side. The goal is to make the rotation feel automatic, not reactive.
How to time a custom game drill
The drills above work best in fifteen-minute blocks, not in one-hour blocks. The reason is that the muscle memory for a smoke or a teleporter rotation decays after about twenty minutes of practice, so it is more useful to drill a single action for fifteen minutes and then play a real match than it is to drill for an hour and burn out. A weekly rotation of two drills per map is enough to keep the muscle memory fresh without overtraining.
How to read a Bind round from the spectator perspective
Watching a Bind round is a useful exercise for a coach or a developer who wants to understand how a small map affects round flow. The key is to watch the timer, not the kill feed. The first ten seconds tell you which site the attackers are committing to, the next ten seconds tell you how the defenders are reacting, and the final twenty seconds are usually decided by utility rather than by aim. A round in which the attackers are still in the lobby after thirty seconds is a round the defenders have already won.
From a design perspective, that round flow is the same shape every competitive shooter eventually arrives at: a quick read phase, a commitment phase, and a post-plant phase. Bind just makes the read phase shorter and the commitment phase louder, which is why it rewards teams that communicate well and punishes teams that do not.
Bind Valorant round-by-round: a worked example
To make the strategy above feel less abstract, it helps to walk through a single round on Bind Valorant and label each decision as it happens. The example below is a pistol round, but the same shape shows up in every eco round and most full-buy rounds.
Round start. Attackers buy light shields and a single smoke. The smoke is placed on A heaven from A lobby. The duelist peeks A short and calls one defender on the platform. The second player swings from the lobby and clears heaven. The third player plants the spike in the default position. The fourth player holds the switch door. The fifth player watches the attacker-side teleporter exit for a defender rotate.
Round at thirty seconds. Defenders send two players through the defender-side teleporter to retake A. The lurker on the attacker-side teleporter exit spots the rotation, calls it, and the four players on A site collapse on the retake. The round ends with a 4v2 attackers advantage and a defuse denied by the post-plant molly.
The shape of this round is the same shape that plays out hundreds of times in ranked: smoke, peek, plant, hold, retake, trade. The only thing that changes is which agent is playing which role, and which site the team has chosen. Learning the shape of the round is more useful than memorizing any single lineup, because the lineup only matters once the round shape is already decided.
Frequently asked questions
How many sites does Bind Valorant have?
Bind has two bomb sites, A and B, with no third site and no extended mid area in the traditional sense. The two sites are connected by a pair of teleporters that compress rotation time, which is the single biggest design difference between Bind and other two-site maps in the pool.
Where is the defender teleporter on Bind Valorant?
The defender teleporter is located on the defender side of the map and exits directly into B site. It is a one-way teleporter with a short charge-up sound, which means the rotation is fast but visible to any attacker paying attention to the audio cue.
Where is the attacker teleporter on Bind Valorant?
The attacker teleporter is located on the attacker side of the map and exits near A site, just outside the main entrance. It is loud and is one of the first areas a defensive team will smoke or watch after they hear the charge-up sound.
What is the best agent on Bind Valorant?
There is no single best agent, because Bind rewards different utility on attack and defense. A reasonable default composition is a controller for smokes, a duelist for entries, an initiator for flashes, a sentinel for site lockdown, and a flex player who can float between sites. The exact picks depend on the team’s communication style.
How do you take A site on Bind Valorant?
The default A take is to smoke A heaven and A short from A lobby, then send a duelist into A site while a second player wraps through A short. The remaining three players split between the post-plant positions, with one player watching the attacker-side teleporter exit for a defender rotate.
How do you take B site on Bind Valorant?
The default B take is to smoke B elbow and B long from B lobby, then send the entry duelist into the site. B is small, so the post-plant positions are tighter than on A, and a single defender with the right utility can hold the site for a long time.
Is Bind easier to attack or defend?
Bind is generally considered slightly defender-favored in uncoordinated play, because the defenders can rotate through the teleporter for free once they have information. In coordinated play, the map is closer to even, and the team that uses the teleporters first tends to win the round.
What are the most important callouts to learn first on Bind Valorant?
The first callouts to learn are A lobby, A short, A heaven, A switch, B lobby, B elbow, B long, hookah, and the two teleporter callouts. Those nine or ten callouts cover the majority of the positions a player will see in a typical round.
Should you buy an Operator on Bind Valorant?
The Operator is a strong pick on Bind because the sightlines on both sites are short and predictable. The trade-off is that Bind is small enough that a single rifler can rush a long-sightline Operator holder, so the weapon is more reliable in coordinated hands than in solo queue.
How long is a Bind round in Valorant?
Bind uses the standard Valorant round timer, which is one hundred seconds plus any added time from spike plant. The map’s small size and short rotates mean the practical round length is usually shorter than the clock, because both teams tend to commit to a site within the first thirty seconds of the round.
Does Bind have a mid area like other maps?
Bind does not have a traditional mid area, but it does have a short market corridor that connects the two sites without going through either teleporter. The corridor is the closest thing to a mid lane and is the most common lurk path for a solo player who wants to put pressure on the opposite site without committing to a take.
Why do players call it “bind” in short?
The map is named Bind, and the short form is usually just the name itself. There is no separate abbreviation, and the in-game ping wheel uses the same name. The reason the name matters in conversation is that it distinguishes the map from a verb in chat, which is why most teams type the full word rather than a shortened form.
Leave a Reply